Wedding invitations
DIY Wedding Invitations — Ideas & How to Make Them
Your wedding invitation is the first thing your guests will hold in their hands, and the first hint at the vibe of your big day. That's why more and more couples are choosing to make their own—it's cheaper, more personal, and perfectly matches their style. The good news? DIY wedding invitations don't require artistic talent or expensive equipment. All you need is an idea, a few materials, and a quiet hour. In this guide, you'll find styles and creative ideas for your invitations, a list of materials, a step-by-step tutorial, and some unusual touches—from dried flowers to a QR code linking to your wedding website. We'll also show you how much DIY really costs compared to ready-made options.
Styles and Ideas for DIY Wedding Invitations
Before you reach for the scissors, choose a style. This will determine your paper, colours, and accessories—and it should set the tone for the wedding itself.
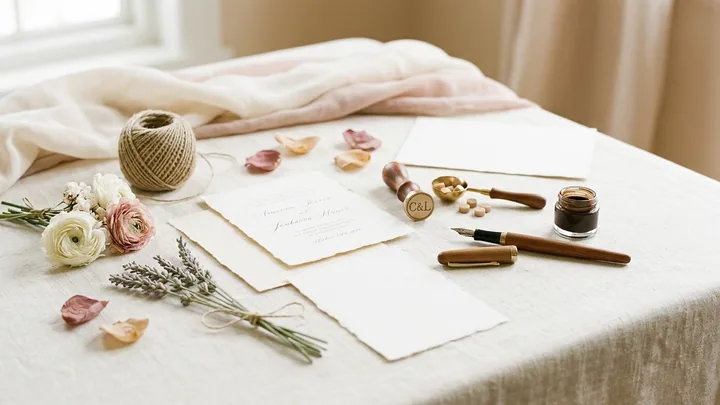
Rustic
Handmade or eco-friendly kraft paper, jute twine, a sprig of eucalyptus, or a dried ear of wheat. A handwritten or typewriter-style font. This style is very forgiving of imperfections, making it ideal for your first DIY project and for a barn or outdoor wedding.
Boho
Earthy colours (terracotta, beige, dusty pink), pampas grass, irregular shapes, and watercolour splashes in the background. Boho loves layers—you can tie your invitation card with a raw-edged ribbon or slip it into a simple belly band.
Elegant and Classic
Thick, smooth paper, a muted palette (white, navy, bottle green, gold), a serif font, and embossed or gilded details. Precision is key here: even margins, centred text, and high-quality paper do all the work.
Minimalist
Lots of white space, a single font, one colour accent. Less is more—this is the easiest style to put together in a free design tool and is also very on-trend.
With Dried Flowers
Real dried flowers or petals glued to the paper or enclosed in a translucent envelope. The effect is stunning, but remember that these invitations are delicate and heavier—check postage costs if you plan to mail them.
Watercolour
A hand-painted background or a print of a watercolour graphic. The soft colour transitions look beautiful under calligraphed names. If you don't paint, you can buy ready-made watercolour templates and just add your text.
With a Wax Seal
A wax seal (wax stick + a stamp with your initials or a motif) to close the envelope or belly band instantly elevates the invitation. It's one of the cheapest ways to make a simple card look exclusive.
Materials and Tools
Get everything together before you start—nothing kills the creative flow like a missing drop of glue halfway through.
- Paper — decorative, handmade, or kraft paper, 250–300 gsm for the main card and lighter (120–160 gsm) for inserts.
- Envelopes — matching the size of your invitations; buy 10–15% more than your guest count to allow for mistakes.
- Printer — an inkjet for watercolours and full-colour designs, a laser printer for sharp, black text. Alternatively, have them printed at a local print shop from a PDF file.
- Scissors, a craft knife, and a cutting mat — straight edges are the foundation of a professional look.
- Glue stick or double-sided tape — tape holds stronger and won't wrinkle the paper.
- Decorative extras — ribbons, twine, dried flowers, wax and a stamp, rubber stamps.
- Ruler, pencil, eraser — for marking out margins and fold lines.
- A free graphic design tool (like Canva) — to create your design and prepare the file for printing.
How to Make a Wedding Invitation Step-by-Step
This tutorial works for most styles. Always make one test invitation before you start the full batch.
- Decide on the format and quantity. Count your couples and families (one invitation per address, not per person), and add a 10% buffer. Choose a size—popular options are A6 (10.5 × 14.8 cm) and a 14 × 14 cm square.
- Design your layout in an editor. Set up bleed (3 mm) and safe margins (at least 5 mm from the edge). Choose a maximum of two fonts: one decorative for your names, and one legible for the rest.
- Write your text and proofread it twice. Check dates, times, addresses, and guest names with a fresh pair of eyes, preferably the next day. A typo printed 100 times is a painful mistake.
- Print a test copy. Check the colours, margins, and readability on your chosen paper. Only then should you print the entire batch.
- Cut everything neatly. Use a craft knife and a ruler on a cutting mat—save the scissors for small details. Clean edges are what separate DIY from sloppy.
- Assemble and glue the parts. Attach any inserts, add your decorations, and tie the twine or ribbon. Work in batches (e.g., 10 at a time for each step)—it's much faster.
- Add the finishing touch. A wax seal, a dried flower, or a custom stamp. This is the detail your guests will remember.
- Address the envelopes. By hand or with a stamp. Be especially careful with the etiquette of addressing wedding invitations—it's the most common source of slip-ups.
What a Wedding Invitation Must Include
Regardless of the style, some information is essential. After reading it, your guest should know who, when, where, and what to do next.
- Who is inviting and who is getting married — the couple's names (and parents' names, if they are hosting).
- Date and time — for the ceremony and, separately, for the reception if they are in different locations.
- Venue — full addresses for the ceremony and reception venues, ideally with the name of the location.
- A request to reply (RSVP) — a deadline and method for confirming attendance. This is crucial for catering numbers and the seating plan.
- Travel and practical information — parking, accommodation, reception start time, dress code.
- A welcome personal touch — a short motto or one of these wedding invitation quotes to set the tone.
If you're sending invitations well in advance, consider sending a save the date first—that way, the main invitation can be shorter and more decorative.
Unusual Ideas for Wedding Invitations
If you want your guests to feel right away that this will be a special wedding, add an element they won't expect.
Invitations with a QR code
The most practical of all the unusual ideas. You print a small QR code on your paper invitation, and when a guest scans it, they land on your wedding website—complete with a map, schedule, accommodation info, and an RSVP form. This keeps your physical invitation beautiful and minimalist, while all the details live online where you can update them without reprinting anything. You can find out more about how to create them in our guide to invitations with a QR code.
Audio or video invitation
A QR code can also lead to a short recording—your voice inviting guests or a video trailer for your wedding. It's a touching solution that leaves a lasting impression.
Other creative formats
- Ticket invitation — styled like a cinema or plane ticket, with a "final destination" and "departure time".
- Wood or acrylic invitation — impressive for photos and as a keepsake, though heavier to post.
- Map invitation — a fold-out card with a hand-drawn map of your wedding locations.
- Seed paper invitation — paper embedded with seeds that your guests can plant; eco-friendly and symbolic.
How Much Does DIY Cost vs. Ready-Made Invitations?
For many couples, this is the deciding question. As a rough guide, per invitation:
- Professionally printed — typically €2–€7 each for a custom design, less for pre-made templates. You'll also need to factor in delivery costs and any potential revision fees.
- DIY — the cost of materials is often €1–€3 each (paper, envelope, extras). You save on labour but "pay" with your time: expect to spend 1–3 minutes on assembly per invitation once you get into a rhythm.
DIY wins on price and gives you full creative control, but it requires time and patience. Ready-made wins on convenience and consistent quality. A smart compromise is a hybrid approach: design and print them yourself, but move the logistics (RSVP, directions, updates) online with a QR code. Your paper invitation stays beautiful, and you don't drown in phone calls and texts.
Addressing Invitations & Etiquette — In a Nutshell
The most common mistakes on invitations are incorrect guest names and inconsistent addressing formats. The key is to be respectful and clear. For couples, use their preferred titles and names. For families, be specific about who is invited. We've gathered detailed rules and examples in a separate post on addressing wedding invitations—check it out before you print, because it's a mistake you can't undo.
Frequently Asked Questions (FAQ)
Is it difficult to make your own wedding invitations?
No, not if you choose a simple style (like minimalist or rustic) and make a test copy before starting the whole batch. The design and first few cuts take the most time—after that, assembling in batches is quite efficient. You don't need to be an artist, just precise and patient with good quality paper.
How long does it take to make DIY wedding invitations?
The design and file preparation usually takes 2–4 hours. The assembly itself can be measured in minutes per invitation—for 50 invitations, realistically plan for one or two evenings of work. Working in stages (printing, cutting, gluing, decorating) makes the process much faster.
How do I add a QR code to a paper invitation?
Generate a QR code that links to your wedding website, save it as a high-resolution image, and place it in your design (at least 2 × 2 cm, on a light background, with a clear margin). After printing, always test it with your phone. In souveil, a QR code is generated automatically and directs guests to your site with RSVP, directions, and a gallery.
What should I write for the RSVP?
Provide a clear deadline and method: "Please RSVP by 30th July". If you're using a QR code, add: "Confirm your attendance on our website—just scan the code". The simpler it is for your guests, the more replies you'll get on time.
Is DIY cheaper than ready-made invitations?
Usually, yes. The material cost for one DIY invitation is typically €1–€3, while a custom-designed professional one can cost €2–€7 each. The savings are real, but you "pay" with your own time for the design and assembly. For very small quantities, the price difference can be minimal.
Create beautiful paper invitations, and leave the logistics to souveil. Add a QR code that takes your guests straight to your wedding website—with online RSVP, directions, and a photo gallery. No more chasing replies by text, no reprinting every time something changes. All in one app for €99.